.svg)
.svg)
.svg)


Managing event attendees in Quest is designed to be flexible and user-friendly, offering several ways to invite and manage travelers. Whether you're planning a small gathering or a large corporate event, Quest makes it easy to ensure all your travelers are accounted for. Here's a breakdown of the steps and options for adding travelers to an event in Quest.
1. Navigate to Your Event
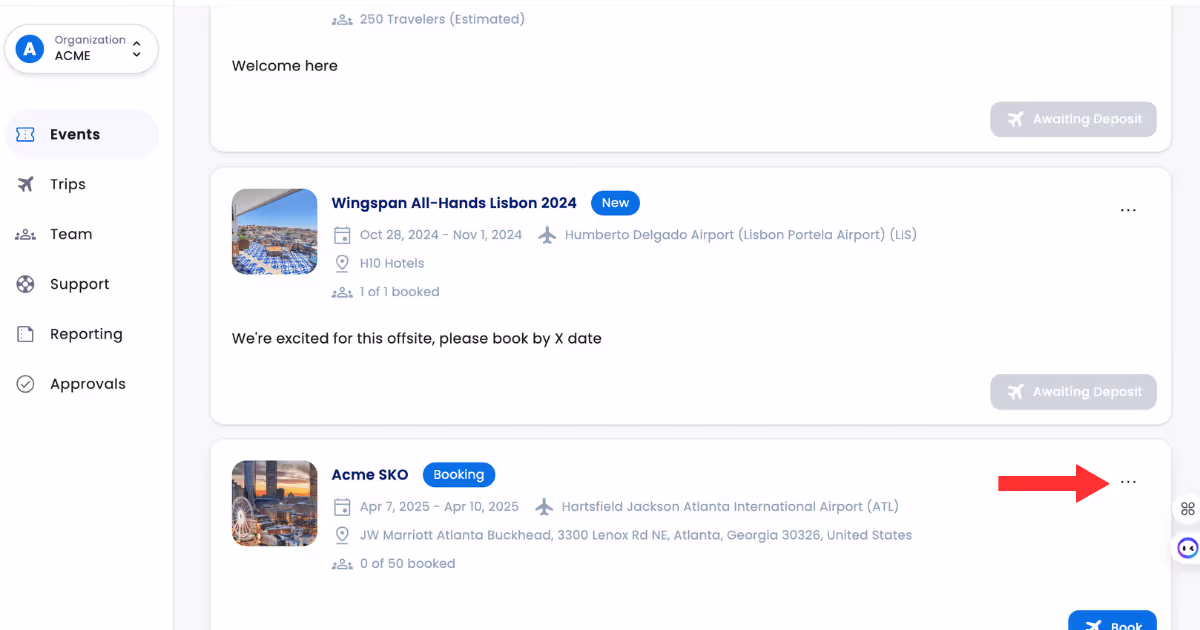
First, go to the Events tab in Quest. Click on the event you wish to add travelers to—in this example, we’ll use the Acme SKO event.

Next, click on the three dots on the right side of the event card and select Event Details.
2. Access the Attendees Tab
Once you’re in the Event Details section, click on the Attendees tab. This is where you'll begin adding travelers to your event.
.avif)
3. Three Ways to Add Attendees
Option 1: Magic Link
The easiest and most efficient way to invite travelers is through the Magic Link. You’ll find a purple tab above the Attendees list labeled "Copy Event Link." Click this, and then copy the link to share with your travelers.
.avif)
Option 2: Add Attendees in Bulk
If you have a list of travelers ready, Quest lets you upload them all at once from a spreadsheet. Here’s how:
- Click the Add Attendees tab on the right side.

- If it’s your first time using this feature, download the Excel template by clicking Download the template. Fill out the template with the travelers' details and upload it back into Quest.
.avif)

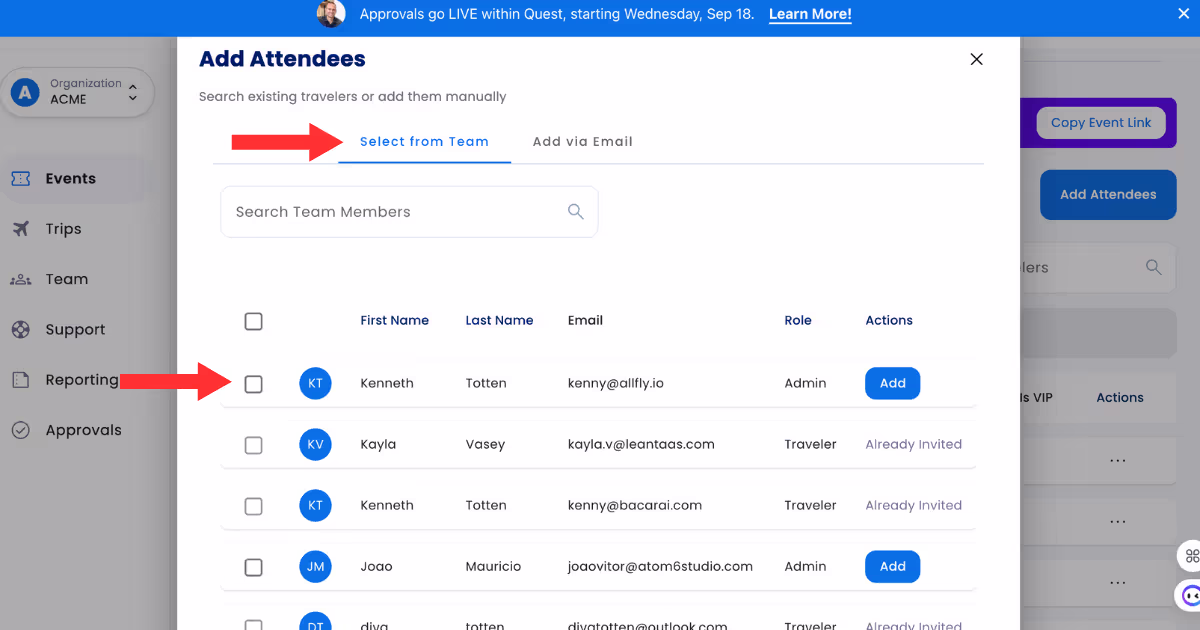
- For past events, if you already have travelers saved in Quest, you can easily select from your existing list by clicking the Select from Team tab. Check the box next to the traveler’s name and click Confirm to save.
Option 3: Add Travelers Individually
For more personalized management, you can add travelers one by one:
- Click the Add via Email tab.
- Fill in the traveler’s first name, last name, and email address.
- Specify if they are a VIP traveler by checking the corresponding box.
- Click Confirm to save each individual traveler.

Adding Travelers to the Quest Portal
If you need to add travelers to Quest in general, not tied to a specific event, follow these steps:
- Navigate to the Team tab.
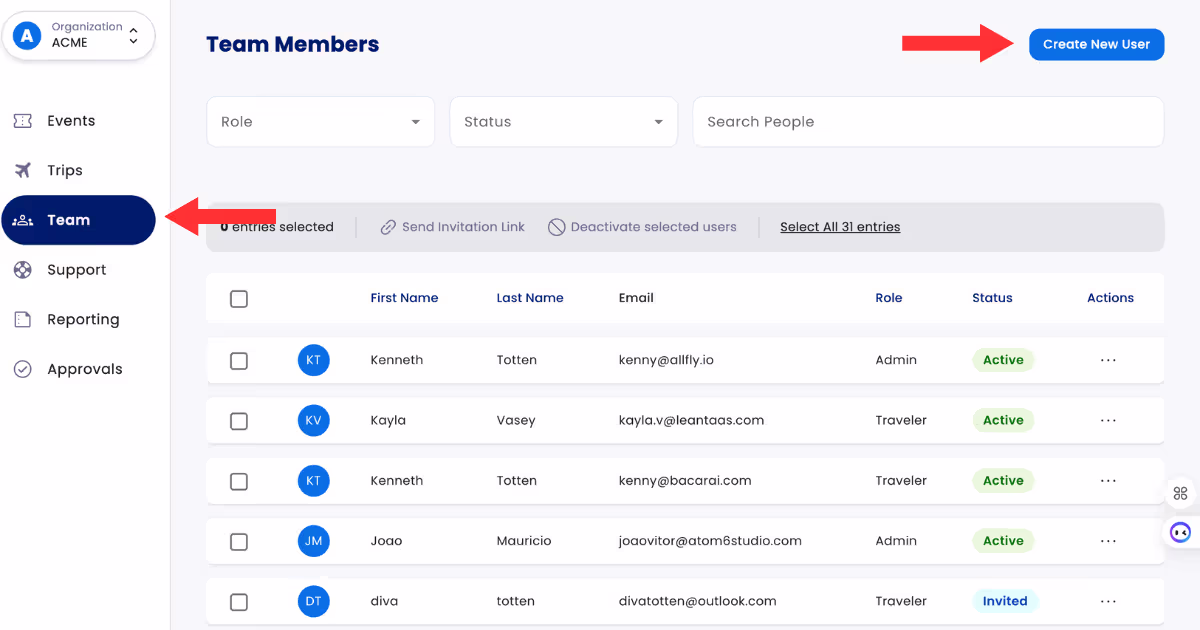
- Click on the Create New User button.
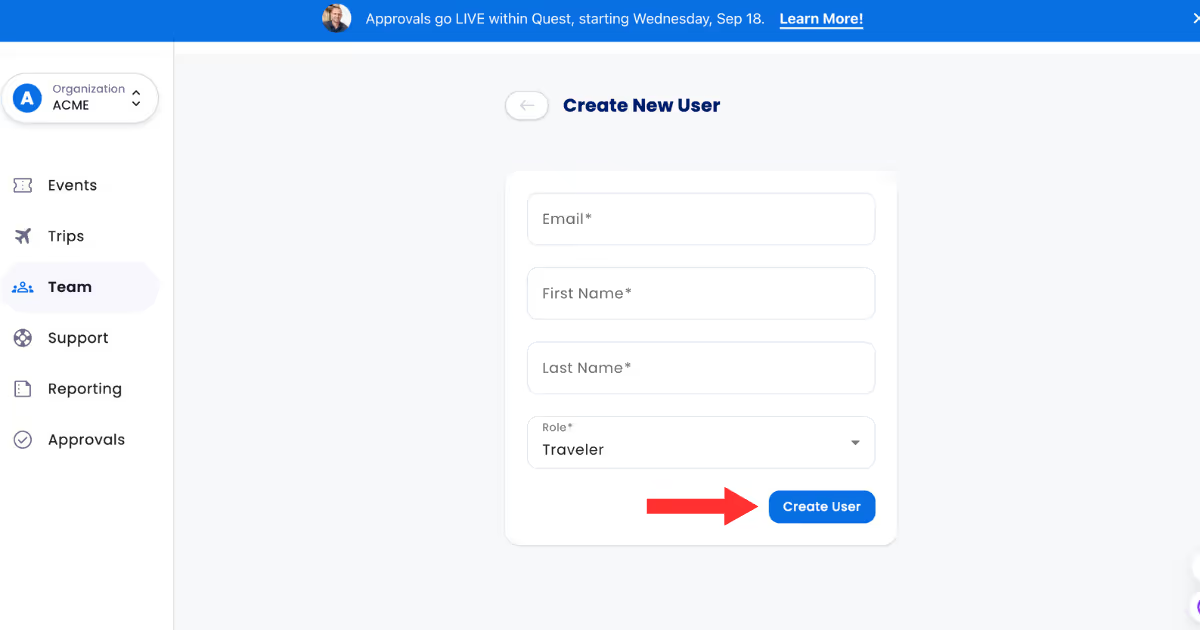
- Fill in the required details like name, email address, and role.
- Click Create New User to invite them. The invited person will receive an email to set up their profile and join the company’s Quest workspace.
Whether you're adding travelers in bulk, using the Magic Link, or inviting them individually, Quest offers multiple ways to streamline attendee management for your events. You can confidently manage event attendees, ensuring that everyone’s travel plans are easily booked and tracked.
This flexibility makes Quest a powerful tool for meeting planners and event coordinators, ensuring every traveler’s booking experience is seamless.


.png)


.png)
.png)


-min.png)
.png)
-min.png)
.png)
-min.png)
.png)


.jpg)